Creating a New Page
Web Interface (GitHub)
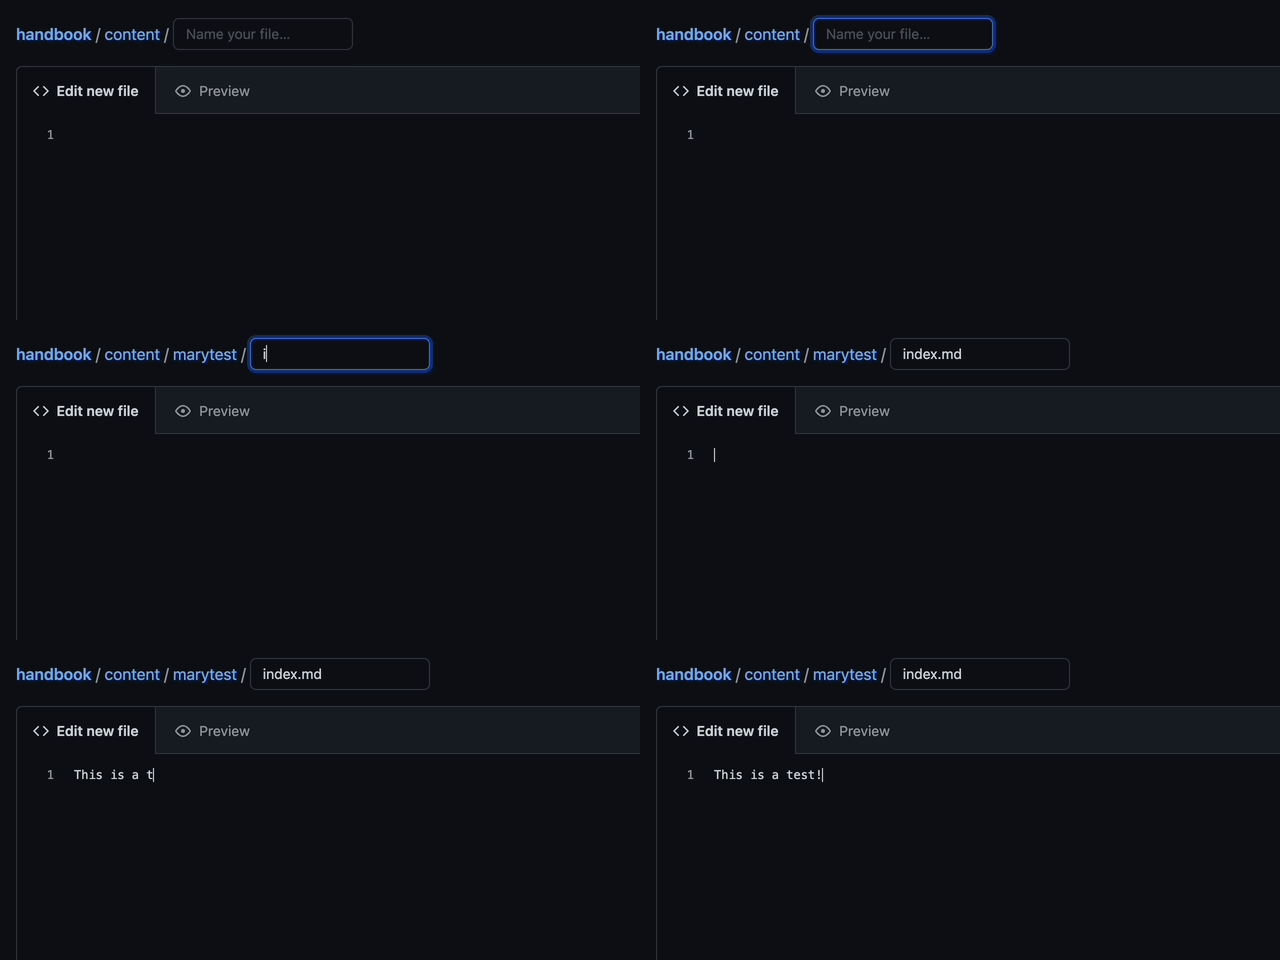
A screen recording of how to make a new file and include it for review in the web interface for GitHub:
Steps:
This is just one path for creating a new page in the Handbook. These steps can be completed in a different order, or outside of the GitHub web interface.
-
Navigate to the directory where you want to create your new page.
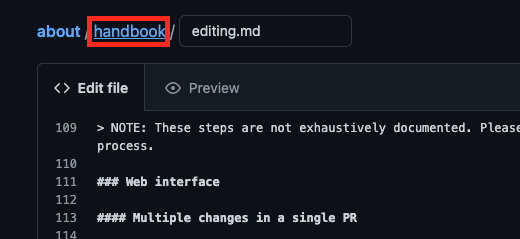
- If you aren’t sure how to get there in GitHub, click “Edit This Page” on the Handbook page where you’d like to add your new page. Then, look for the file path towards the top of your GitHub page to click up into the directory:

-
Click Add File > Create New File
-
Name your file. -Make sure the name ends with “.md”. This makes it a Markdown file. For example: editing.md
-
Enter your content in Markdown. See Markdown Resources for help with formatting.
-
When you’re happy with your new page, scroll to the bottom of the page to the Commit changes box.
- Type a short, one-line summary of your change in the first text field (instead of the default
Create filename.mdtext). - Type a more detailed explanation of your change in the larger text field.
- Select the Create a new branch for this commit and start a pull request option (if it’s not already selected).
- Name your branch something memorable. You’ll need to search for this branch in a future step.
- Press the Commit changes button.
- Type a short, one-line summary of your change in the first text field (instead of the default
-
Click on the dropdown arrow on the “Create Pull Request” button, and choose “Create Draft Pull Request”. This will keep your PR from auto-notifying code owners or reviewers before it’s ready. Then, click “Draft Pull Request”. -You don’t have to create a Draft Pull Request at this point, you can create a regular one. A Draft PR just indicates that you’re still working on this change.
-
You’ll likely see that the docsite check has failed. Click “Details” on the docsite check line to see more information. If your error says “disconnected page (no inlinks from other pages)”, this means you need to create a link into this page. For other failures, see Handbook Checks.
-
In a new tab, navigate to the page where you want to create a link to your new page. -You can do this in the same tab if you’d like, but it may be easier to keep your PR up in its own tab while you do this part.
-
Click on the branch dropdown on the upper left side of your screen (it probably says “main”). Search for the branch you named when creating your first change, and select it.

-
Click the pencil icon to edit your file.
-
Create a link using a relative path in the appropriate location on your page.
-
Commit your changes.
-
Return to your PR, and the checks should rerun. Click “Ready for Review” to turn your Draft PR into a regular PR. Once checks pass, merge your changes.
- If you forget to merge your pull request, you’ll be reminded about it after 14 days of inactivity on that pull request. If the pull request sees another 7 days of inactivity, it will be automatically closed.
macOS
GitHub Desktop version
Here’s a screen recording of the steps (written out below) for macOS:
Prerequisites
- Download and install GitHub Desktop.
- Launch GitHub Desktop and sign into it using your GitHub username.
- Clone the
sourcegraph/handbookrepository (assuming to the~/Documents/GitHub/handbookfolder on your computer).
Optional:
- Use Typora to edit and preview Markdown (
.md) files.
Steps
- In GitHub Desktop, open the
handbookrepository that you cloned previously. - In Current Branch, select
mainif it’s not already selected. - Press the Fetch Origin button to get the latest contents of the repository.
- In Current Branch, create a new branch with a short name (like
add-travel-guidelines, no spaces or punctuation). - Edit files in the
~/Documents/GitHub/handbookfolder on your computer. - When you’ve edited the files and saved your changes, GitHub Desktop will show you the changed files in the left sidebar. Confirm that your changes look good by viewing the diffs for each file.
- In the bottom left
Summary (required)text field, type your commit message (a one-line description of the change) and a longerDescriptionbelow. - Press the Commit to add-travel-guidelines button (where
add-travel-guidelinesis the branch name you chose earlier). - Press the Publish branch button.
- Press the Create Pull Request button.
- On the pull request page in your web browser, select reviewers and wait for reviews/approvals, then merge to make the changes live.
Creating a new directory or folder
To create a new directory (sometimes we call it a new folder), you’ll follow the same steps outlined for creating a new page. The difference comes in naming your file.
- Follow the steps to create a new file outlined above.
- When naming your file, first type the name of the new folder or directory you’re creating, without
.md. Type/after the name to indicate it’s a directory. A new input box should pop up to the right. - Enter your file name as you would when creating a new file, adding an
.mdto the file name to indicate it’s a markdown file. Continue creating your path as outlined above.
